We all know that delivering a new website means testing out different elements and themes. You can’t just go making changes directly on a live site, right? That’s where a website staging environment comes in. Simply put, it’s a duplicate version of your website used specifically for testing, before you launch those changes to the live site. It’s the perfect way to make sure everything works perfectly before going public, without risking anything on your actual site. Want to know more? Keep reading the blog.
What Is a Website Staging Environment?
In a nutshell, a staging environment is a replica of your live site where you can safely test updates, new features, and plugins. It’s essentially a copy of your site; no risks, no mess.
- Exact Replica: The staging environment looks like your production site, with all your content, images, and themes.
- No Public Access: It’s hidden from search engines and the public, so you can test freely without anyone seeing the work in progress.
- Risk-Free Testing: You can experiment with changes, try new features, or test plugins without affecting your live site or users.
So, in short, it’s like having a “sandbox” to play around in before you go live.
How to Create a Website Staging Environment
Credit: crocoblock.com
Let’s walk through how to create a staging website. Here’s a step-by-step guide to setting up a staging environment for your WordPress site. It’s easier than it sounds!
Step 1: Choose Your Hosting Provider
First things first: You need a web host that offers staging environment features. Many top WordPress hosting providers like WP Engine, SiteGround, and Kinsta have this feature built in. Some platforms even allow you to create a staging site with just a click of a button.
If your hosting service doesn’t provide this feature, you may need to set it up manually or use plugins like WP Staging or Duplicator.
Looking for a reliable hosting provider? Fortunately, at Ignishost, we offer reliable and affordable hosting services, tailored to your needs. So, get in touch with us.
Step 2: Clone Your Live Site
Once you’ve picked your host, it’s time to make a copy of your website. This step is crucial because it ensures the staging environment is a true replica of your live site.
Tip: Many hosting providers allow you to clone your site automatically. But if you’re doing it manually, you’ll need to copy your database and files to the new staging directory.
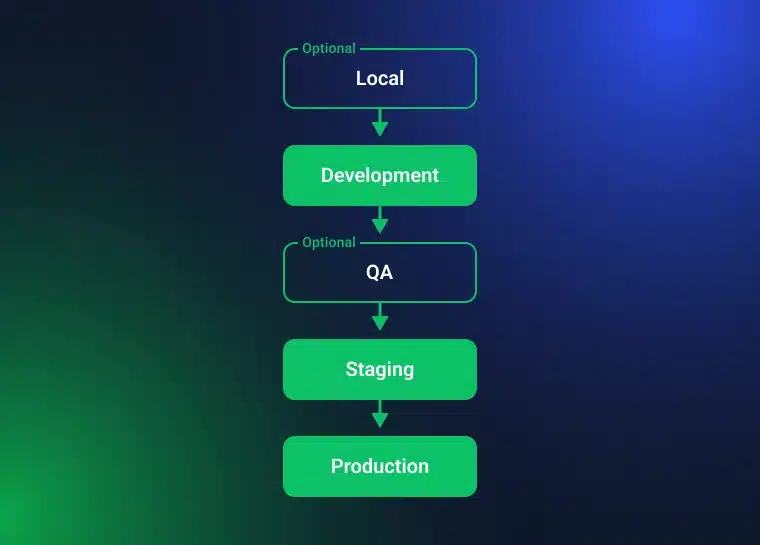
Step 3: Set Up a Subdomain or Subdirectory
Now, you’ll want to set up a subdomain (like staging.yoursite.com) or a subdirectory (like yoursite.com/staging) where your staging site will live. This keeps it separate from your live site and ensures it remains hidden.
Step 4: Test Everything
This is the actual part: testing! You can now use the staging environment to test website changes safely. Test all the changes, updates, and features you want to implement.
- Check for Compatibility: Does the new plugin work with the existing ones?
- Test Mobile Compatibility: How does your site look on mobile devices?
- Check Speed: Any changes affecting site speed?
Step 5: Push Live (When You’re Ready)
Once you’re happy with everything in the staging environment, it’s time to push your changes live. Depending on your hosting provider, this may be as simple as clicking a button to sync changes from staging to live.
Benefits of Using a Staging Website
Why should you bother with a staging website at all? Here are the benefits of staging websites:
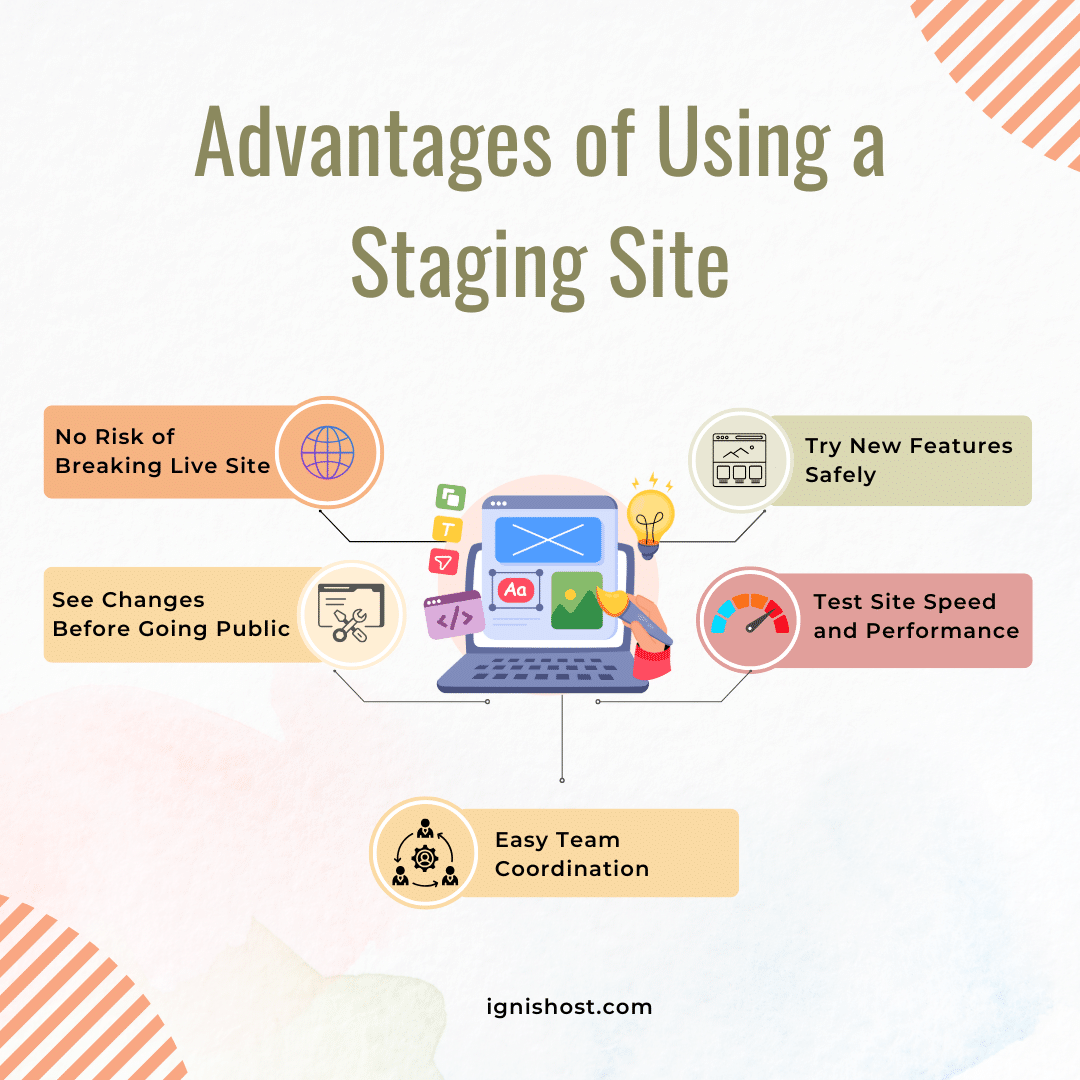
- No Risk: Test anything without worrying about messing up your live site.
- Preview Major Changes: You get a chance to see how everything will look before it’s seen by the public.
- Safe Experimentation: Try out new features, plugins, or designs without breaking anything.
- Improve Performance: Test updates and optimizations in a safe space before applying them to your real site.
- Easy Collaboration: If you have team members working on your site, a staging environment provides a safe platform for collaboration.
These are just a few of the benefits of staging websites. But what about the platform you’re using to build your site? If you’re unsure whether to go for WordPress or a custom-built site, you can find all the details you need in our article on WordPress vs. Custom Built Sites. It’ll give you a better idea of which one fits your needs!
Why You Really Need a Staging Environment for Your Website
Here’s a tough question: Why do you need a staging environment? It might seem like an unnecessary extra step, but trust me, it’s a critical tool for any serious website owner.
- Avoiding Errors: Without a staging site, you’re making changes directly to your live site, which increases the risk of breaking something. If that happens, you could lose traffic, damage your reputation, and upset website visitors.
- Ensuring Site Functionality: If you try out a new plugin or update directly on the live site, there’s always a chance it won’t work as expected. A staging website lets you test it first in a safe, isolated environment.
- Peace of Mind: Knowing that you can test changes before they go public gives you the confidence to experiment and improve your site without worrying about the consequences.
Tips for Using a Staging Environment
Here are a few tips to help you make the most of your website staging environment:
- Keep It Updated: Sync your staging site regularly with your production server to ensure it stays current.
- Test Real-Life Scenarios: Don’t just test for bugs; try real actions your users might take, like signing up for a newsletter or making a purchase.
- Limit Access: Keep your staging environment private to ensure only trusted team members can access it.
- Backup Often: Just like your live site, make sure to back up your staging site regularly to avoid losing any work.
- Stay Organized: If you’re working on multiple features, keep your staging site organized and use version control tools to track changes.
Staging vs. Testing Environment: What’s the Difference?
Here’s a simple comparison between staging and testing environments:
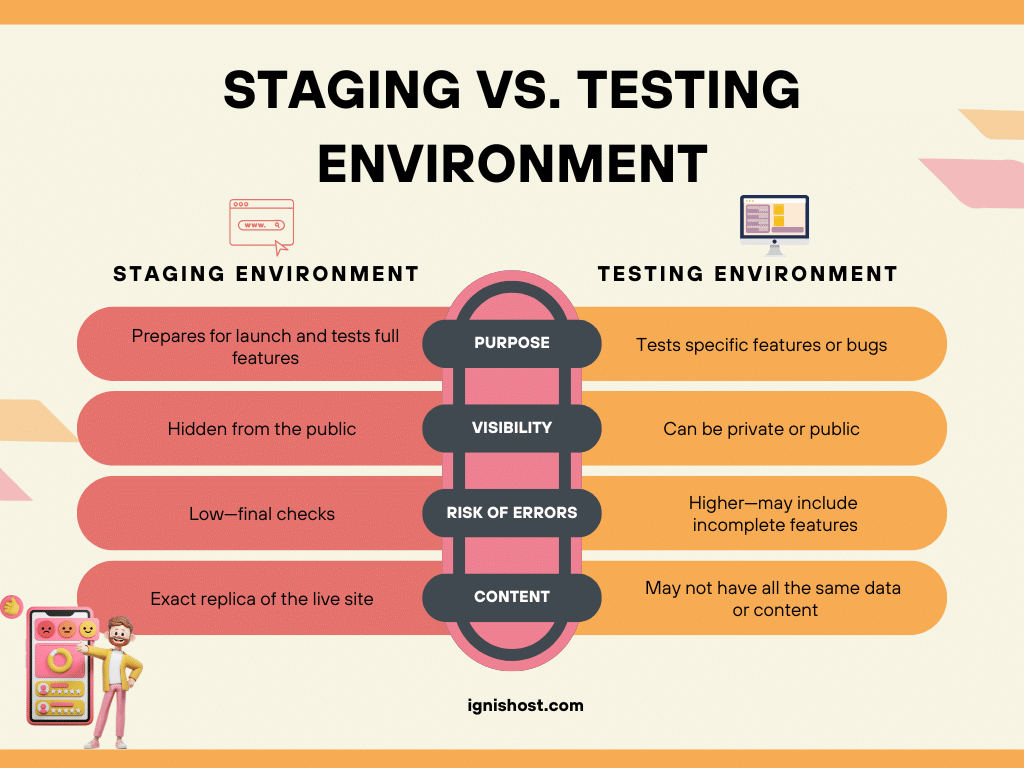
I hope this table helps you understand the differences and work on your staging site efficiently.
Ending Remarks
In a nutshell, a staging environment is an invaluable tool for any website owner. It’s a safe space where you can make changes, test updates, and experiment without risking your live site. From setting up a staging site in WordPress, trying new features, to testing website changes, having this environment in place ensures your site will run smoothly for your users.
Frequently Asked Questions
And now to wrap up our discussion on the website staging environment, here are some questions answered for your convenience.
What is a staging environment used for?
A staging environment is used to test updates, features, and changes to your website before pushing them live.
How do I set up a staging site in WordPress?
You can set up a staging environment using plugins like WP Staging, or you can set it up manually through your hosting provider.
Do I need a staging environment for my website?
If you’re planning to make frequent updates or changes to your site, then yes, a staging environment is a must.
How does a staging environment differ from a testing environment?
A staging environment replicates your live site for testing full features, while a testing environment focuses on individual features or bug fixes.
Can I use a staging environment for testing new plugins?
Absolutely! A staging environment is the best place to test plugins, themes, and other updates without affecting your live site.